

| DDoS? DDoS(Distributed Denial of Service) is an attack that sends a large amount of malicious traffic to make a website or network resource unoperable. |
Service not available
It was a hot summer day☀️. It was a haze rising through the heat of the highway asphalt on my way to work. The smartphone navigation screen that guided me to the office was filled with numerous notifications and red messages. Aka. My once peaceful commute time turned red.
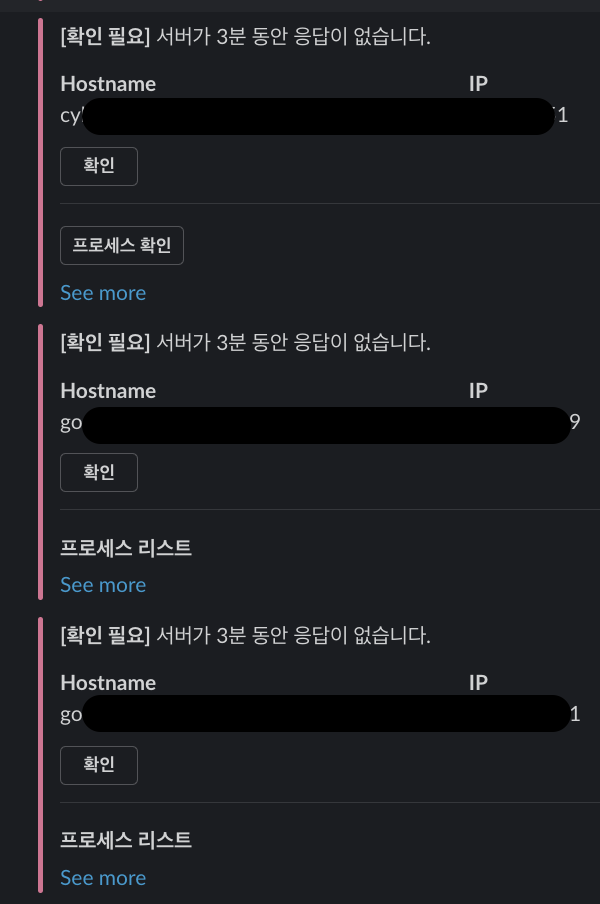

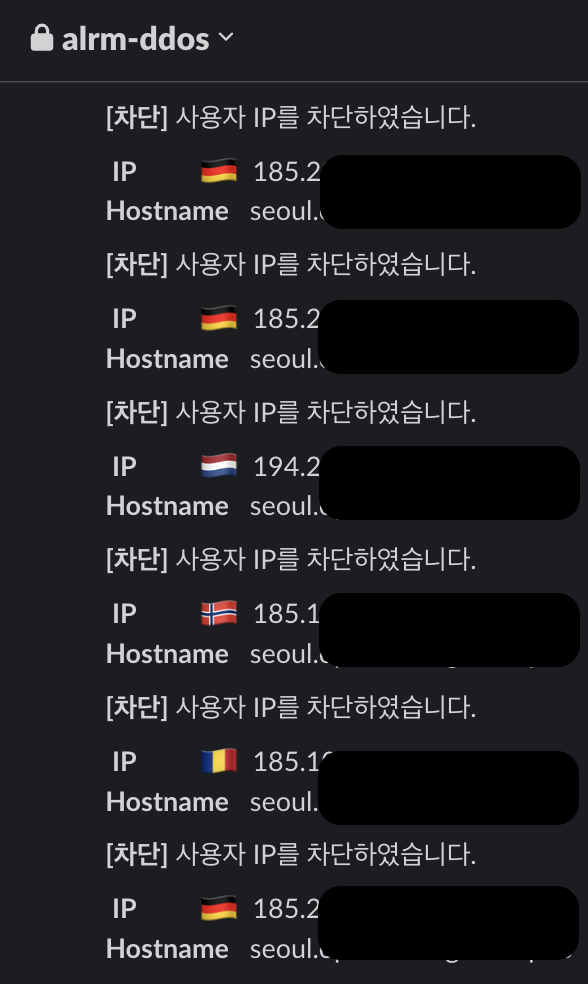
What service providers fear most is service failure notifications such as <Figure 1> and <Figure 2>. I also always hope that these notification messages will not come. I tried to calm my startled heart and first figure out the cause of the service failure. At that moment, a huge number of messages poured into the DDoS attack notification channel. Yes. The cause of the service failure was none other than a DDoS attack.
Let’s stop the traffic tsunami
DDoS is an attack that sends a large amount of malicious traffic to make a website or network resource unoperable. In Korean, it is called a ‘distributed denial of service attack’.
DDoS interrupts service by sending a large number of requests to the target server (victim) from multiple computers or devices, causing the server to fail to process the requests and go down or slow down. Attacks are carried out using computers or IoT devices infected with malware, and these devices are called zombie PCs or zombie computers. A set of zombie computers controlled by a C&C server (Command & Control Server) is called a botnet.
A typical service company would be at the receiving end of a DDoS attack, but goorm may be in a position to carry out a DDoS attack by providing a cloud container-based integrated development environment(IDE) called goormIDE. For this reason, we are operating several policies to detect and defend against DDoS.
So, what are some ways to overcome obstacles caused by unexpected traffic or attacks as above? Let’s take a look at some of the most basic methods together.
1. Fail2ban
| Fail2ban is an intrusion prevention software framework that protects servers from brute force attacks. |
Scenario
When a service is attacked, let’s learn how to defend against DDoS on the web server, which primarily receives all traffic. The web server will use the widely used Nginx and will defend against attacks using Nginx’s error log and Fail2ban. Traffic generation used the open source tool Siege, an HTTP/HTTPS stress tester.
Installation
There is no need to build a separate Fail2ban practice environment. Create an Ubuntu 18.04 Blank container in goormIDE.
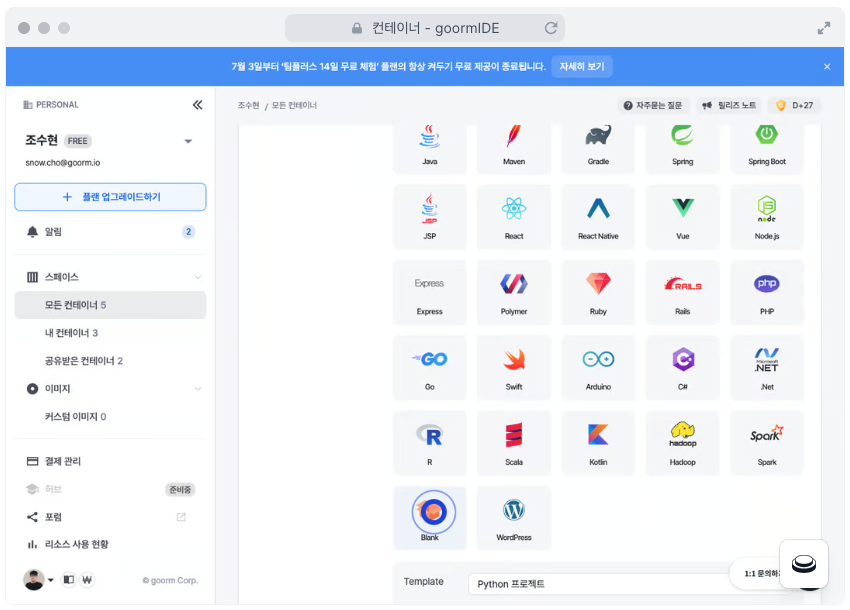
Open goormIDE in the Chrome web browser and click [New Container]. goormIDE is free, but you must sign up to use it. If you have not registered, refer to Help and register as a member.

Name the container appropriately and select [Blank] from the software stack (see <Figure 7>). An empty project will be selected as the template, and Ubuntu 18.04 LTS will be selected as the OS. There is nothing to change. Click [Create] to create a container. Once the container is created, run it immediately.
Installing Nginx
Next, we will install Nginx. Click ‘Terminal’ located at the bottom of goormIDE and enter the following command (see <Figure 8>). Then the Linux package will be updated to the latest state.
apt-get update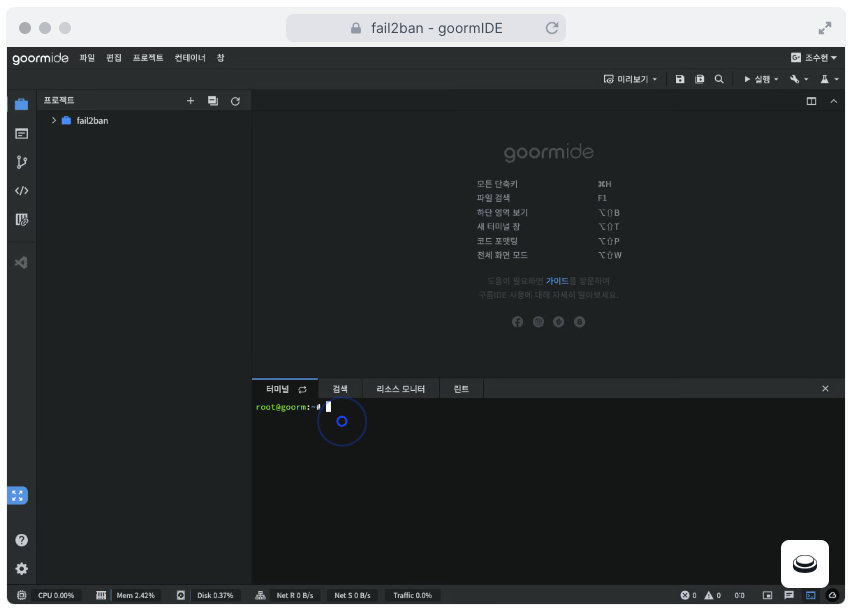
Nginx web server can be installed with the following command.
apt-get install nginxTo detect DDoS attacks, Nginx also requires some settings. Open the /etc/nginx/sites-enabled/default file using the vi command in the goormIDE terminal, and add the line of code below at the top as shown in <Figure 9>.
vi /etc/nginx/sites-enabled/defaultlimit_req_zone $binary_remote_addr zone=ddos_limit:10m rate=10r/s;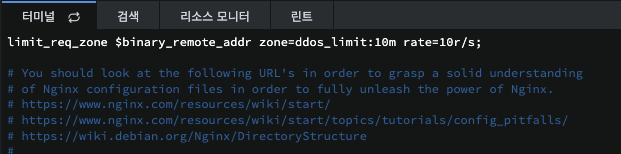
| 💬 If you are not familiar with how to use the vi editor, use KLDP’s How to use vi editor article. |
Next, if you scroll down, you will see the code ‘location / {’. Add the following three lines within the braces ({}) and save as follows.
limit_req zone=ddos_limit burst=10 nodelay;
real_ip_header    X-Forwarded-For;
set_real_ip_from 0.0.0.0/0;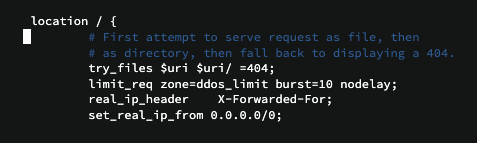
This completes the Nginx setup. Run Nginx by entering the following command in the terminal. If you followed along well, Nginx will run without any problems.
service nginx startInstall Fail2ban
Fail2ban can be installed with the following command.
sudo apt install -y fail2banUsually, Fail2ban is run immediately after installation is completed, but in goormIDE, the log of the sshd daemon is viewed as the default setting of Fail2ban. cannot be confirmed, so execution fails (see <Figure 11>).

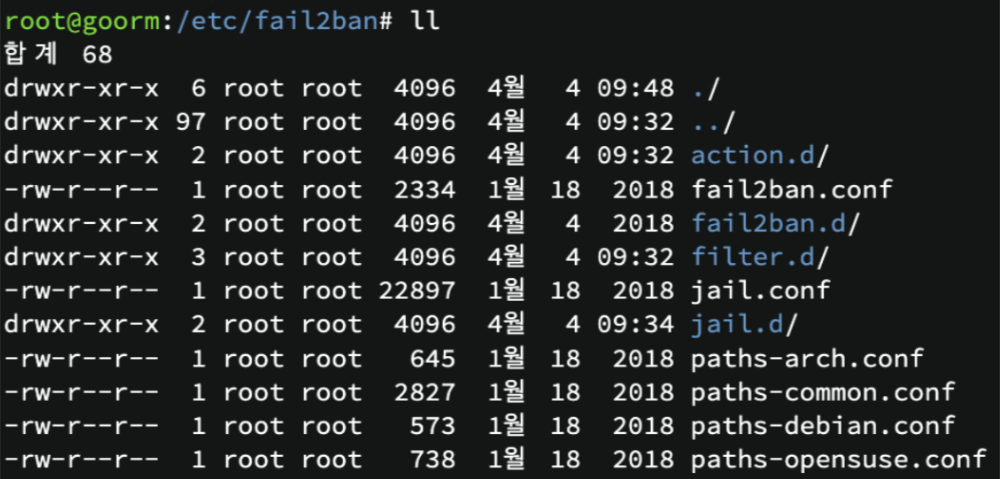
If you look at the directory structure of Fail2ban’s configuration file, there are many configuration-related files such as action.d, fail2ban.d, filter.d, and jail.d (see <Figure 12>). Due to space constraints, I cannot cover everything, so I will only introduce a few key points in DDoS defense.
You can prevent DDoS attacks coming from Nginx by modifying jail.local in the Fail2ban configuration file as follows. Each setting is explained in comments, so please read them. If you have any questions, please contact us via comment or email. ah! Don’t forget to comment (like, comment, subscribe, and turn on notifications) before making an inquiry.
# /etc/fail2ban/jail.d/jail.local

[nginx-limit-req]
enabled = true                       # 설정 on/off
filter = nginx-limit-req             # 사용할 필터 이름
findtime = 60                        # 모니터링 시간 (60초)
maxretry = 10                        # 60초 동안 10번 이벤트 발생 시 차단
bantime = 10800                      # 차단 시간 (3시간)
port = http, https                   # 차단 대상 포트
protocol=tcp                         # 차단 대상의 프로토콜
banaction = iptables-multiport       # 차단 방식 선택 ( iptables 이용 )
action_with_ban = %(banaction)s[name=%(__name__)s, bantime="%(bantime)s", port="%(port)s", protocol="%(protocol)s"]
action = %(action_with_ban)s    # 차단 액션 등록
logpath = /var/log/nginx/*error.log  # 모니터링할 로그 파일 경로
Disable the sshd daemon that was problematic earlier by editing the /etc/fail2ban/jail.d/defaults-debian.conf file as follows. Just change the value of enabled under [sshd] from true to false and save.
# /etc/fail2ban/jail.d/defaults-debian.conf

[sshd]
enabled = false
The principle of DDoS detection and defense using Fail2ban is as follows. When a malicious user attempts a DDoS attack, before the server responds to a specific IP, Nginx leaves the requested IP and limit_req log in the error log if it exceeds the 10 queues set in the Nginx configuration file.
Fail2ban monitors this error log in real time. If the log occurs more than 10 times in one minute and reaches the threshold, TCP ports 80 and 443 of the IP are blocked using a server firewall (iptables). This prevents DDoS attacks from reaching Nginx and prevents services from stopping due to unnecessary load.
Now, let’s run Fail2ban as well. It is no different from running Nginx. Just enter the following command in the terminal.
service fail2ban startInstall Siege
siege is a representative open source-based stress testing tool. Let’s install Siege by entering the following command in the goormIDE terminal.
sudo apt install siege -yThere is nothing to configure separately. Let’s check if it is actually protected. The siege command used is as follows.
siege -b -c 100 localhost -vIf you conduct a test using Siege in which 100 users send requests to the Nginx server, the Siege test will soon stop as shown in
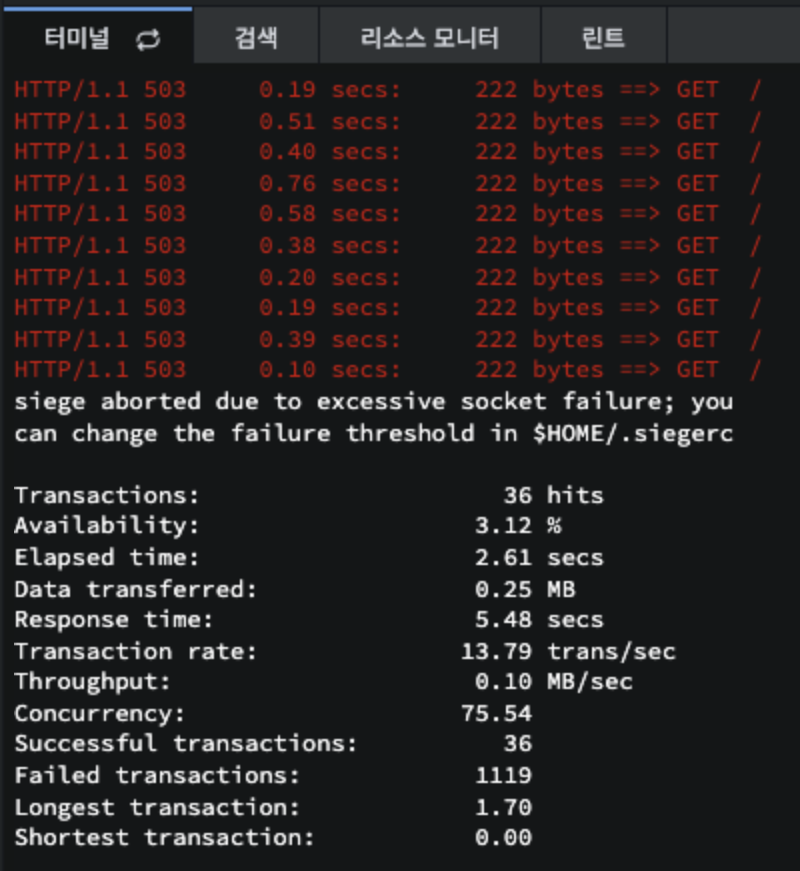
If you check the Nginx error log with the following command, you can see that the web server is no longer responding to the request along with the ddos_limit character.
tail -f /var/log/nginx/error.log
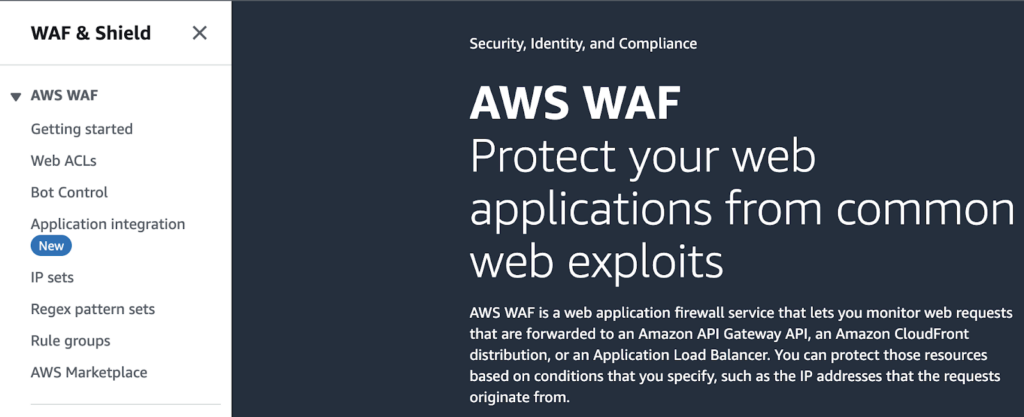
2. AWS WAF protects against web exploits and bots
| AWS Web Application Firewall(WAF) may affect availability, compromise security, or consume excessive resources. Protects applications from common web exploits (attacks that take advantage of security vulnerabilities in computers or computer-related electronics) and bots. |
If you provide services using the AWS cloud, you can respond to various attacks such as DDoS or brute force attacks with the WAF provided by AWS.
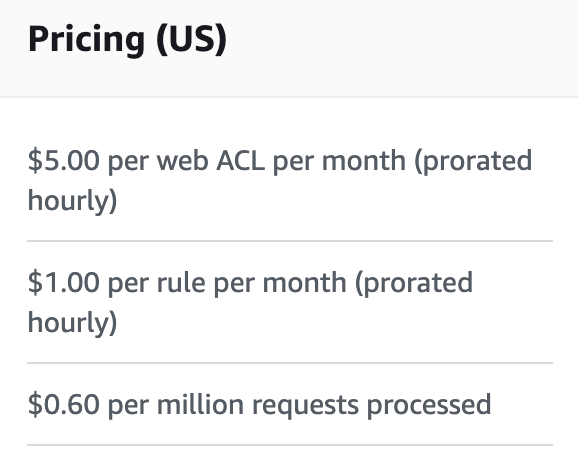
However, unlike Fail2ban, which is free, AWS WAF is a paid service. Therefore, be careful during practice to avoid being charged excessive fees.
Setup
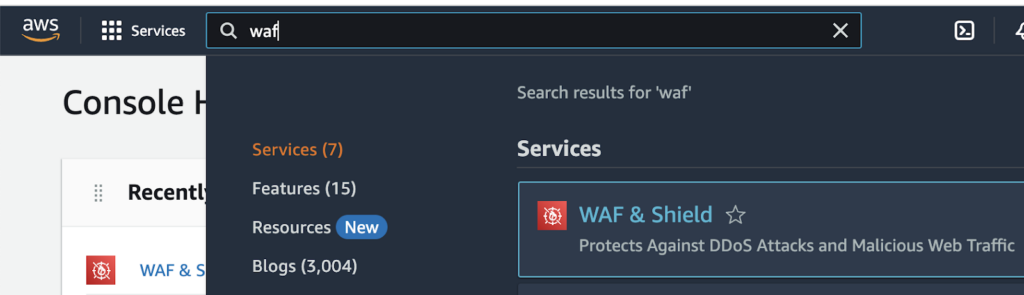
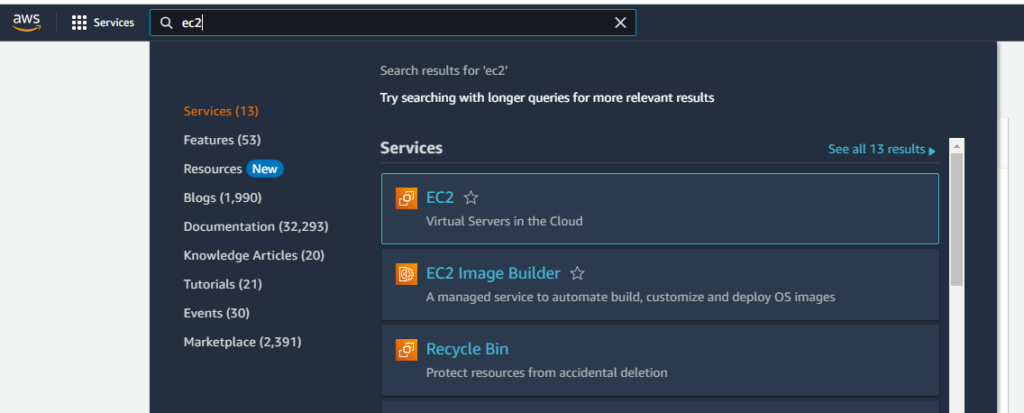
After connecting to the AWS Console, enter waf in the service search box. The first WAF & Click Shield to go to the WAF service.
When you go to the AWS WAF service dashboard, the WAF Welcome page welcomes you as shown in <Figure 17>.
First, click the [Web ACLs] menu on the left side of the AWS WAF dashboard screen and move to the region where the service is operating (see <Figure 18>).
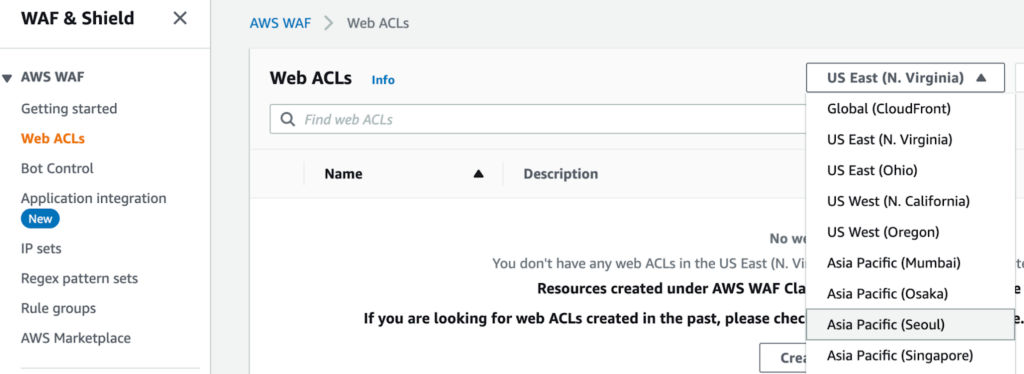
Click [Create web ACL] in the upper right corner to go to the new ACL creation page.

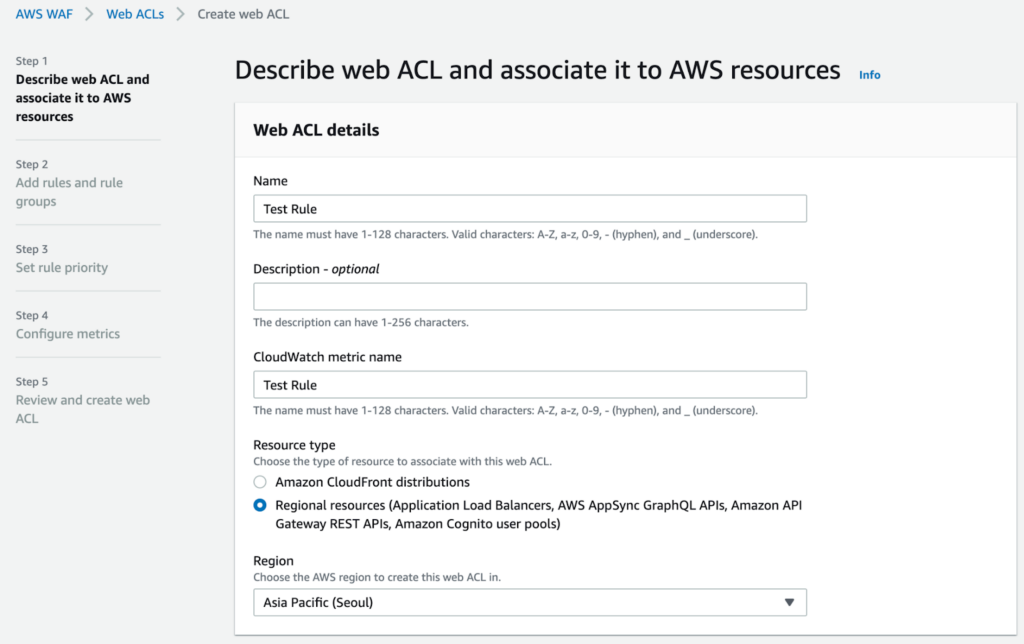
Enter an appropriate name in Name and click [Next] at the bottom to add the rule you want to apply.
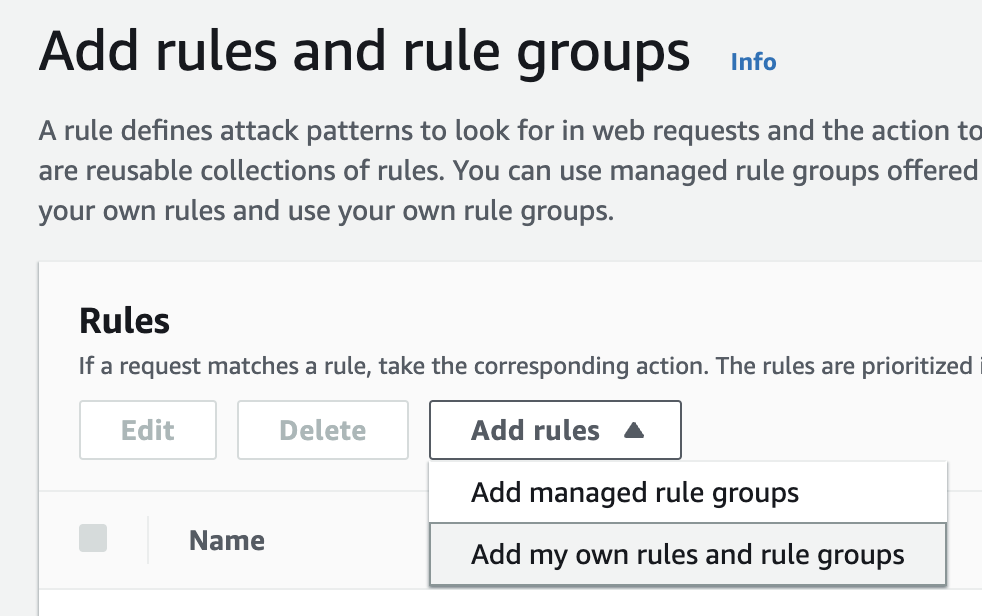
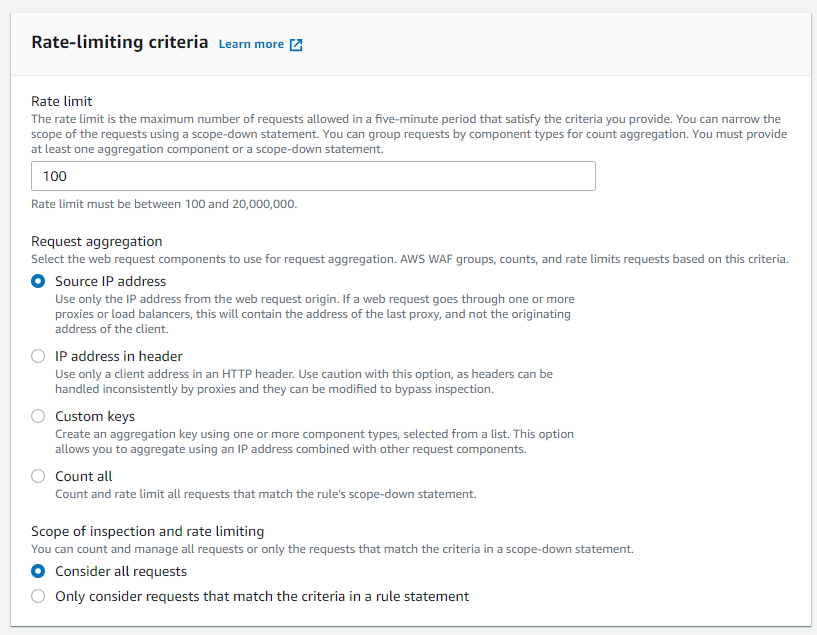
The rule to be added is a simple rule that blocks any request exceeding the set threshold for 5 minutes by viewing it as abnormal behavior. The reason for adding these rules is that DDoS attacks send a large number of requests in a short period of time. Certain attacks may pass these rules by sending requests slowly, but are not covered here for space reasons.
In Step 2, you can add other rules by clicking [Add rules] → [Add my own rules and rule groups].
Now let’s add a rule. Select Rule builder and name the Rule.

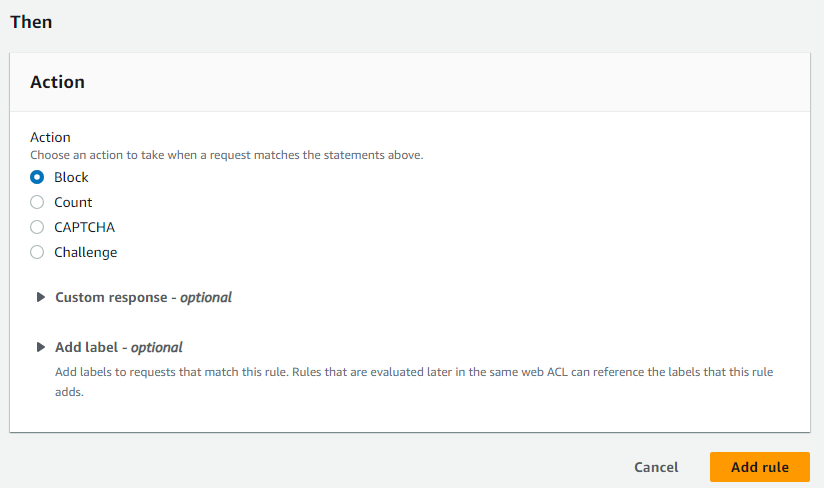
Set the Rate Limit to 100 to temporarily block user requests when 100 requests are received in 5 minutes. AWS WAF not only blocks, but also allows you to select Count, which only monitors, CAPTCHA, which asks “Are you a robot?”, which we often see, and Challenge, which verifies the browser (see <Figure 24>).
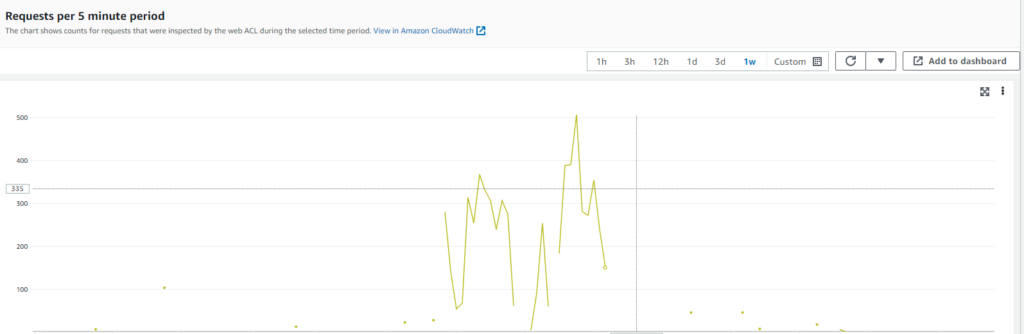
If you set it like this, you can check the status of the request in a graph on the Overview screen. You can check blocked logs and all allowed traffic with CloudWatch. In this case, CloudWatch may also be charged additional fees.
So far, we have looked at the easiest way to block traffic with WAF, a paid service from AWS. It wouldn’t have been too difficult since you could create rules with just a few mouse clicks. In addition to the features introduced, AWS WAF provides rules to determine attacks in various ways. Many features of AWS WAF are usually paid, so be careful not to be charged excessive fees.
3. Auto Scale
| Auto Scaling is a core technology that enhances the flexibility of the cloud and is used for CPU, memory, disk, and network It automatically adjusts the size of resources by monitoring metric values of system resources such as traffic. This allows users to effectively respond to unexpected service loads and reduce costs. |
Autoscale is a representative way to prevent service problems not only from actual attacks, but also from sudden increases in users or early morning hours when it is difficult to respond.
Setup
Auto Scaling practice is conducted under the assumption that an EC2 instance, Launch Template, and load balancer are set up. Auto Scaling can be set up in AWS EC2 service. First, log in to the AWS console and open the EC2 service.
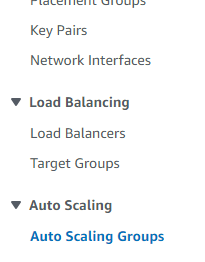
If you look at the bottom left menu on the EC2 service page, you can find the Auto Scaling Groups menu.
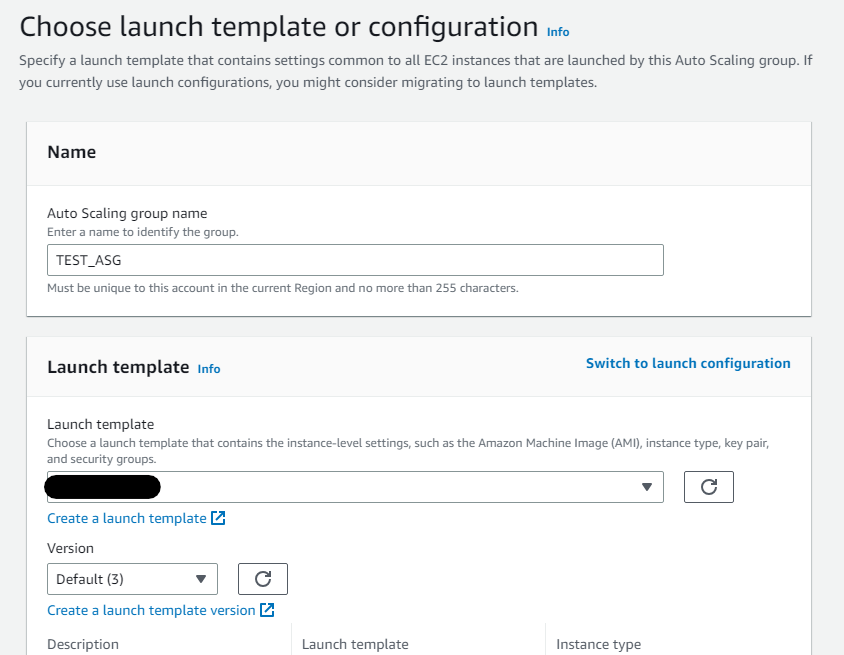
On the Auto Scaling Group creation page, click the orange button on the right, [Create Auto Scaling group].

Enter an appropriate name and select the Launch template you are using in the Launch template below (refer to <Figure 30>).
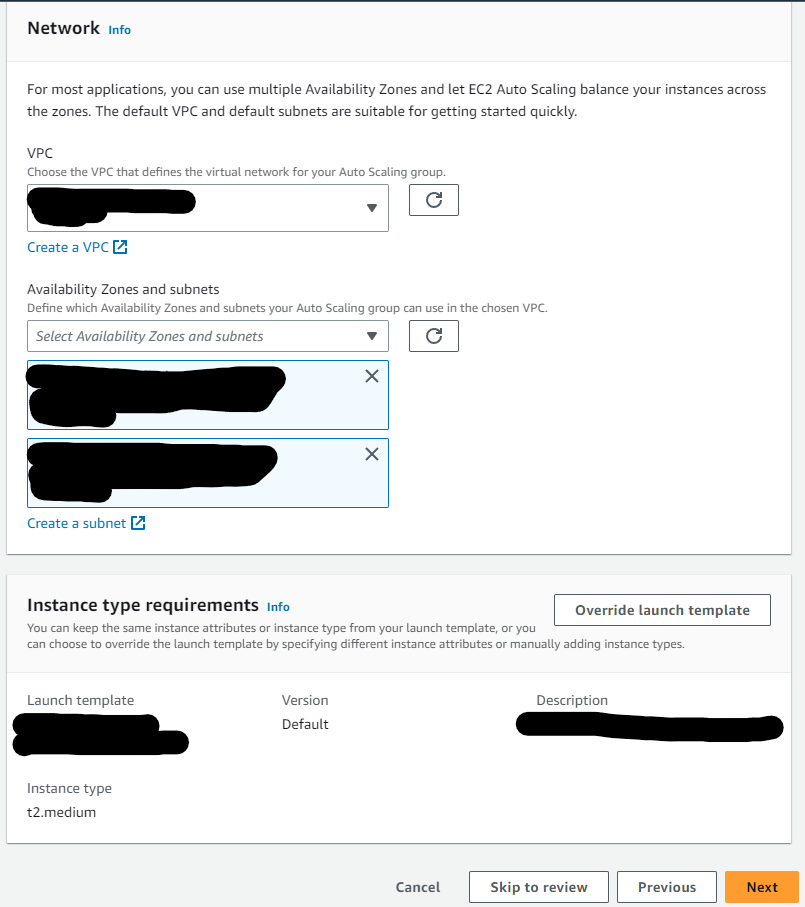
<Figure 31> is the settings page where you can set up the network. After first selecting the VPC with the EC2 instance you want to register for Auto Scaling Groups, select Availability Zones and Subnets, and then click [Skip to review], you can create Auto Scaling Groups right away without any complicated settings.
However, to make more detailed settings, we will click the [Next] button instead of [Skip to review] to look at other options.
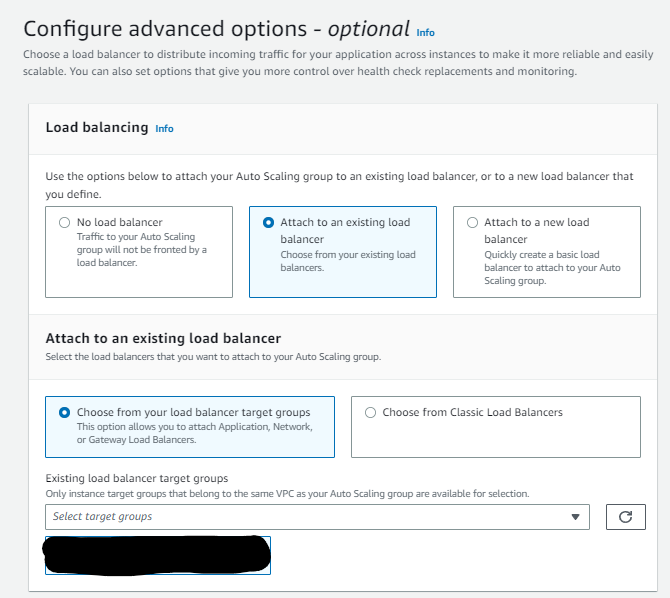
When you click the Next button, options for connecting the Auto Scaling Group and load balancer appear. You can choose between not connecting to a load balancer, connecting to an existing load balancer, or connecting a new load balancer. Here, select [Attach to an existing load balancer] and [Choose from your load balancer target groups] to connect to the load balancer target group.
There are two more settings left. However, even if you set it up to this point, there is no problem using Auto Scaling Groups. Those with keen eyesight may have already noticed the word ‘optional’ in the description menu.
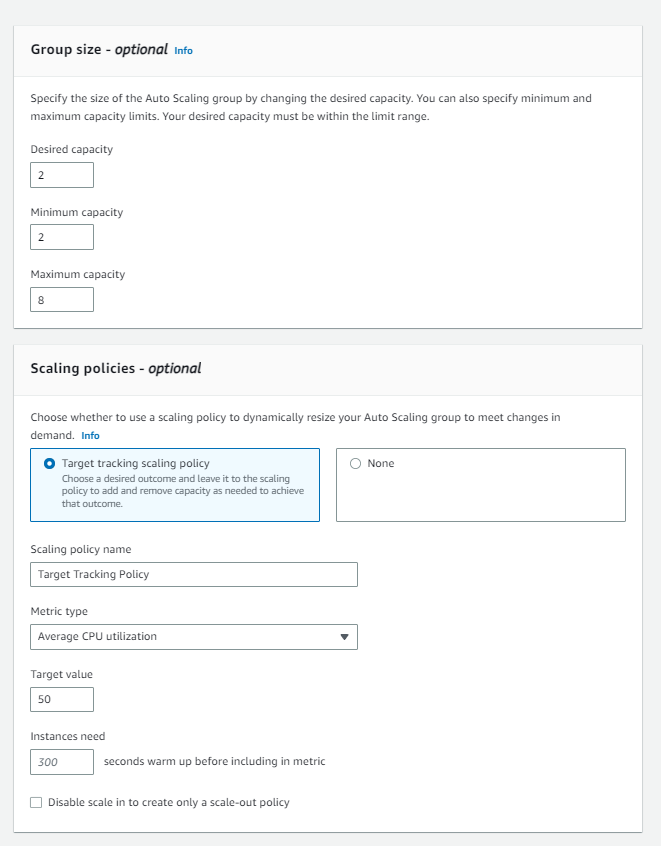
The first option is group size. You can specify the scaling range by specifying the desired basic capacity and minimum and maximum capacity.
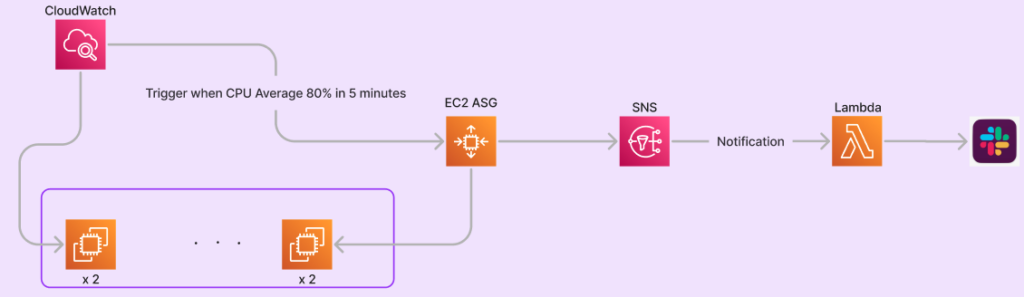
The second option is the scaling policy. Here, you can set the policy under what conditions to scale. The default setting is to scale when the average CPU usage reaches 50%.
Leave it as is and click [Skip to review] to final check the settings. If there is no problem, click [Create Auto Scaling group] to create Auto Scaling Groups.
Once all settings are completed, Auto Scaling Groups are created as follows. Now, up to 8 additional instances will be created depending on the EC2 CPU resource usage used by the service.
One more tip: you can manually scale by editing the desired capacity of the created Auto Scaling Groups.

Concluding
As the size of the service grows, the number of external abuses and vulnerability attacks is bound to increase. In today’s world where new attack techniques and vulnerabilities abound every day, we looked at three ways to deal with DDoS attacks, which are the easiest to attack services and, in the worst case, can stop services. In addition to the three methods introduced, there are many different ways to respond to DDoS.
Although only the most basic methods were introduced, I hope that this article will be of some help to the infrastructure operation and security teams who are struggling with numerous attacks such as APT and vulnerability attacks as well as DDoS attacks.