

When I joined goorm and was getting used to PM work, I was given the task of renewing the GPU container service (beta). We established a renewal plan without a hitch, including examining feedback and inquiries received through customer inquiries, analyzing competitive services, and creating user scenarios. In the process, I learned about an open source called ‘Stable Diffusion.’
It wasn’t the first time I heard it. I guess I didn’t pay much attention. At that time, the PM’s occupational disease recurred. A bottle that you can research and try yourself. I installed Stable Diffusion directly on goormIDE and used it like this for several days, even trying to sleep after work. Now that this has happened, I decided to leave it in writing. I also came up with a plausible title. ‘AI and a drawing story’. Contrary to the grand title, the article written is about ‘Installation of Stable Diffusion WebUI in goormIDE’.
by John, Snow
| 💬 What is goormIDE? It is a cloud-based integrated development environment(IDE). To put it simply, it is a type of editor that developers use when writing code, just like MS Word with which we write documents. It is easy to think of it as a development tool that combines a type of editor with a compiler and cloud hosting functions. GPU Container (Beta) is a service that allows anyone to use NVIDIA Tesla T4 GPU for free, although there is a time limit. The reason it is beta is because it is a release stage where errors are checked and feedback is received from users before the official release. Therefore, when using it, you should take into account that the function may still be unstable or there may be problems with operation. |
What is stable diffusion?
Stable Diffusion is a generation technology that converts text into images, released as open source by British AI startup Stability AI. This is my brother AI. Generative AI refers to ‘artificial intelligence’ that learns the patterns and structures of input data and then creates new data with similar characteristics (Source: Wikipedia).
The literal translation of stable means ‘stable spread.’ As its meaning suggests, the source code of Stable Diffusion is open source and anyone can use it. Stable Diffusion, along with Midjourney, is receiving great attention as one of the representative image generation AI types.
What we will cover here is Stable Diffusion WebUI(Stable Diffusion WebUI) among stable diffusion. Stable Diffusion WebUI is a project that makes Stable Diffusion available in the terminal as a web service (GUI). Image generation AI, which requires a paid fee to use, can be easily used as a web service by just going through the difficulties of ‘installation’ and ‘infrastructure’.
What can I do with this?
With stable diffusion, instead of drawing a picture yourself, you describe it in text and AI draws the picture. Let’s give some examples?
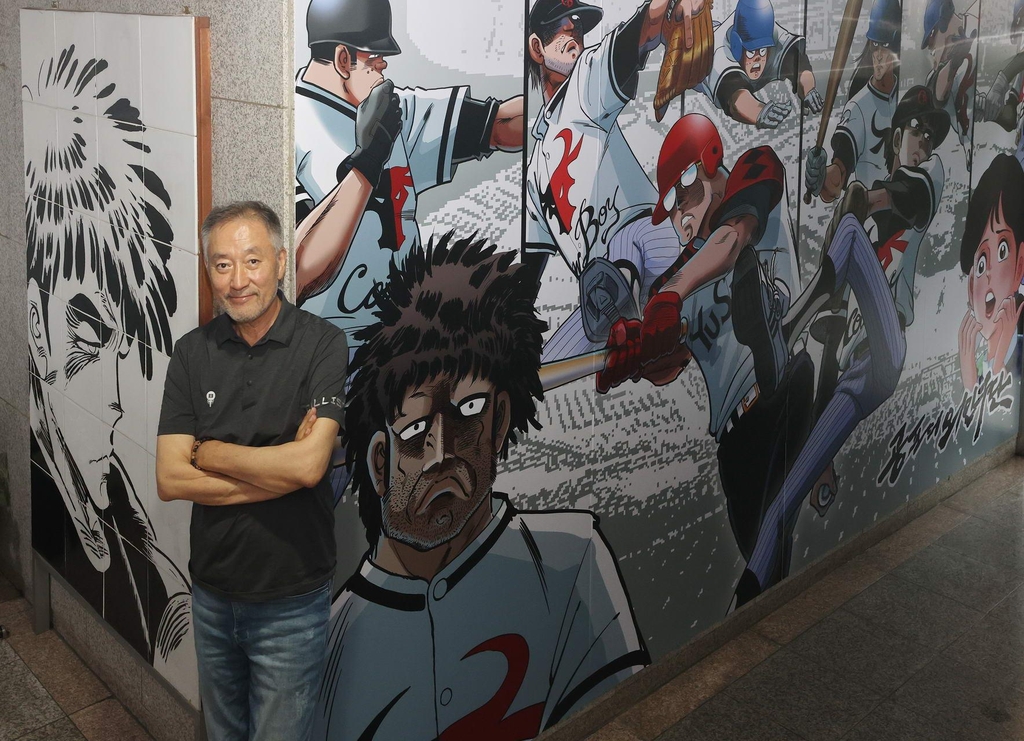
High school foreign troops. Do you remember the cartoon Armageddon and Magpie? I don’t know about the MZ generation, but this is a cartoon that swept the Korean comics industry in the 1970s and 1980s. Artist Lee Hyun-se, who drew these cartoons, is currently working on the ‘Lee Hyun-se AI Project.’ This is a project where generative AI learns the character of ‘Magpie’ among Lee Hyun-se’s cartoon characters and draws webtoon-style characters. Another cartoon, High School Foreign Legion, will be redrawn and a modern version of ‘High School Foreign Legion’ will be published. With generative AI, will the work receive eternal life even if the author dies?
The expectations placed on generative AI in the comics, webtoon, and animation industries are extraordinary. This is because generative AI can change the framework of a labor-intensive industry that requires drawing and coloring each page.

There are many uses of generative AI in our daily lives. To insert an image into PowerPoint or a blog, you had to draw it yourself or download the image from an image or graphics sharing service such as Pixabay. Now, you can create and use the image by writing down what image you need.
Have you looked closely at the post thumbnails on the cloud technology blog? Most of these images were created with generative AI. In the past, the blog thumbnail image, which would have been commissioned by a designer, was drawn and used as text.
If you are a designer, try using generative AI as a tool for inspiration. Even for IT keywords that are difficult to express, if you give keywords to generative AI, it will create thousands of images. You can alleviate some of the difficulties of creation by taking inspiration from them and completing your work.
How was it? Do you know what stable diffusion is, what it can do, and what it means to us? Now, let’s move on to the main topic and install and use Stable Diffusion, one of these image generation AIs, in goormIDE. What kind of picture should we draw? Where else can it be used? Aren’t you excited?
1. Let’s start by logging into goormIDE.
First, you must log in to goormIDE. If you haven’t signed up yet, I’ll start by signing up. If you don’t know how to sign up, please refer to Help.
2. You need to create a GPU container
If you have logged in to goormIDE, you are half way to success. The beginning is half… Oh, no. (I won’t lie.) If you successfully log in, create a GPU container.
❶ Click [NVIDIA Tesla T4] to the right of [New Container].
❷ Write down the container name. Here StableDiffusion. Except for alphabets, numbers, hyphens (-), and underscores (_), special symbols or spaces cannot be used in the name.
❸ Once you have entered the name, click the [Create] button.
❹ Note After (?) time, the GPU container is created.
❺ Click [Run Container] to run the container.
The specifications of goormIDE’s GPU container(beta) are as follows. There is no big difference compared to Google Colab. For reference, Colab is a development environment based on Jupyter Notebook and is a service to support Python learning and AI research. We recently changed the user terms and conditions, so free users can no longer use Stable Diffusion. Thanks to this, the number of goormIDE users has increased!
| goormIDE GPU Containerbeta | Google Colab (estimated) | |
| CPU | Low | Xeon(R) CPU @ 2.2GHz |
| Memory | 10GB | 12GB |
| Storage | 40GB | 33GB |
| GPU | NVIDIA TESLA T4 | One of NVIDIA Tesla K80, T4, P4, P100, V100, A100 |
| OS | Ubuntu 20.04 LTS | Linux |
| Usage time | Up to 30 hours per week (reset at 10 a.m. on Mondays) Up to 12 hours of continuous use | 12 hours per day, 90 minutes continuously |
| Remarks | – | Terms of use will change in July 2023 and free users will not be able to use Stable Diffusion |
3. Shall we install Stable Diffusion WebUI?
Now, let’s install the Stable Diffusion WebUI. It may be a difficult process, but if you follow it step by step, you will be able to install it without much difficulty.
3.1 Let’s prepare a cloud account.
Let’s start by creating an account to use for stable diffusion. It won’t be difficult if you follow step by step.
❶ The shell is a program that transmits Linux commands to the OS to perform the task desired by the user. This shell can be used in a program called ‘Terminal’.
❷ This interface, which outputs results by entering commands in text, is called ‘Command Line Interface(CLI)’. The shell is a representative CLI. Just remember to enter the command here to make it work.
❸ First, we will change the password of the root account. In the terminal, type passwd and press enter↵. You will then be asked for a new password for the root account. Change your password by entering the same password twice.
passwd❹ This time adduser goorm command. This is a command to add a user account named ‘goorm’.
adduser goorm❺ This time, enter a different password than the root account twice (for security reasons!). In addition to your password, it will ask for information such as your name, which you can pass by pressing enter↵. When asked if the information is correct, enter ‘y’.
3.2 I will give root privileges to the added account.
Root privileges are required to install stable diffusion. We will give root privileges to the newly added user account(goorm). If you are not familiar with the vi editor, it may be difficult to follow. If you follow the following step by step, you will be able to do it. I trust you!
❶ Run the vi /etc/sudoers command. vi is a text editor widely used in Unix OS. This command means to open the sudoers file in the /etc/ directory with the vi editor.
vi /etc/sudoers❷ A terminal-based text editor opens. Move the cursor with the arrow keys to find the root ALL=(ALL:ALL) ALL text and move the cursor to the end of this text. Next, press the letter ‘a’ on your keyboard once.
❸ When you press the a key, the editor switches to edit mode. Press enter↵ to change the line and type (or copy & paste) goorm ALL=(ALL:ALL) ALL.
goorm ALL=(ALL:ALL) ALL❹ Press the ESC key on the keyboard to exit edit mode.
❺ Then press the : key on your keyboard.
❻ Then type wq! in order and press Enter.
❼ I will organize it. Entering :wq! forces changes (!) to be saved (w) and the editor quits (q).
Did you follow along well? Congratulations.
You have successfully overcome the biggest challenge during the installation process: using the vi editor.
3.3 I will ‘clone’ the Git repository!
Next, we will clone the Stable Diffusion WebUI Git repository into goormIDE. You can think of copying the file from the online storage where the stable diffusion webUI is stored to goormIDE.
❶ GitHub is a web service that provides hosting for Git, a distributed version management tool. Simply put, open source codes are stored on GitHub. Run the following command.
git clone https://github.com/AUTOMATIC1111/stable-diffusion-webui.git❷ When you run the command, the GitHub repository(stable diffusion webUI) is replicated to goormIDE.
❸ Next chown -R goorm stable-diffusion-webui/ command. Cloned stable-diffusion-webui directory will be changed to the goorm account created earlier.
chown -R goorm stable-diffusion-webui/❹ chmod -R 777 stable-diffusion-webui/ command changes the stable diffusion webui directory permissions (read/write, etc.) to allow all.
chmod -R 777 stable-diffusion-webui/3.4 Python 3.10 is required.
Python version 3.10 is required to run the Stable Diffusion WebUI. (For reference, the latest Python version is 3.12.0.) This is due to the PyTorch version, so be careful because it will not run if you install the latest version.
❶ su goorm command. su is a command to switch to another account without logging out of the current account. This means that you will use the goorm account.
su goorm❷ sudo apt install software-properties-common command. software-properties-common is add-apt-repository. Enter your goorm account password to proceed with installation.
sudo apt install software-properties-common❸ sudo add-apt-repository ppa:deadsnakes/ppa command. PPA(Personal Package Archive) is a repository that converts source code uploaded by individuals into a package that others can run on the Ubuntu OS. This command is one of several packages provided by PPA: deadsnakes/ppa. Before installation, you will be prompted to press enter↵ to continue. Press enter↵.
sudo add-apt-repository ppa:deadsnakes/ppa❹ sudo apt install python3.10. Download and install Python 3.10 version from the repository added earlier.
sudo apt install python3.10❺ Run the following command. goormIDE Ubuntu OS has Python 3.8 and Python 3.10, which was just installed. You can select one of the two versions to use, and the following command adds the newly installed Python 3.10 to the selection.
sudo update-alternatives --install /usr/bin/python python /usr/bin/python3.10 1❻ sudo update-alternatives --config python command. This command selects the Python version to use among the options.
sudo update-alternatives --config python❼ We need to use Python 3.10, so we enter ‘1’.
❽ sudo apt install python3.10-venv command. The python3.10-venv package required to build a Python virtual environment is installed.
sudo apt install python3.10-venv3.5 I’ll add some libraries.
❶ sudo apt-get install libgl1. Vendor neutral GL dispatch library This is a command to install the library(GPU related).
sudo apt-get install libgl1❷ sudo apt install libgoogle-perftools4 libtcmalloc-minimal4 command. This command installs TCMalloc, a memory allocation library created by Google. This library improves memory usage efficiency. There is no problem using Stable Diffusion even if you do not install it, but if you do not, every time you run Stable Diffusion, “Cannot locate TCMalloc (improves CPU memory usage)” will be annoying.
sudo apt install libgoogle-perftools4 libtcmalloc-minimal44. thank you for your effort. Now, let’s run it.
Now we will create a Python virtual space and run the stable diffusion webUI. First, cd command to stable-diffusion-webui directory. (Execute the following command.)
cd stable-diffusion-webuiexport command. webui-user.sh file. Since you’ve used the vi editor before, it should be easy this time, right?
❶ Using the vi editor, execute webui-user.sh script file.
vi webui-user.sh❷ When the terminal-based text editor opens, use the arrow keys to move the cursor to the end of the document. Press the a key to enter edit mode.
Press ❸ enter↵ to change the line and paste the following text.
export COMMANDLINE_ARGS="--medvram --share --lowram --port 80 --always-batch-cond-uncond --xformers-flash-attention"❹ Press the ESC key on the keyboard to exit edit mode. Then on your keyboard, press the : key and type wq! and press Enter.
❺ This will save the changes and close the editor.
This is an option that can be changed every time you run the Stable Diffusion WebUI. webui-user.sh If you save the option in the script file, you don’t have to type the command every time you run it. More detailed option information can be found in this document.
Okay, the end is in sight.
Next, create a Python virtual environment.
python -m venv venvThank you for your hard work. Shall we run the stable diffusion webUI with the following command?
bash webui.sh -f❶ You must wait as much patience as when creating a GPU container. The following public URL address will then appear in your terminal window:
running on public URL : https://c0#########.gradio.live❷ running on public URL.
❸ From the pull-down menu, click [Open Link]. A new tab will open in your web browser and the Stable Diffusion webUI site will open in a moment.
| 💬 ERROR: Cannot activate python venv, aborting… An error occurred! If you encounter this error, delete the venv environment with the following command. rm -rf venvCreate a new Python virtual environment with the following commands. python -m venv venvTry running the Stable Diffusion WebUI again. bash webui.sh -f |
| 💬 Not enough memory! Trying to close and restart the Stable Diffusion WebUI. Or, if it terminates due to an error, it may not be able to run again due to insufficient memory. In this case, you must secure memory capacity by terminating the Stable Diffusion WebUI process. In the top menu of goormIDE, click [Container] → [Process List]. Among several processes, /workspace/StableDiffusion/stable-diffusion-webui/venv/lib… Select and then click the [Force Quit] button. |
5. How do you use it?
I will quickly tell you only the basic things you need to know.
Stable Diffusion WebUI provides a UI interface so that anyone can easily use generative AI. It provides features comparable to those of Midjourney, a representative image creation AI. First, let’s look at the basic UI interface of Stable Diffusion WebUI.
❶ Let’s take a quick look at the main interface of the Stable Diffusion WebUI.
❷ This is the area where you can select the ‘model’ to use for image creation. You can add and use the model you want. For reference, a model can be said to be a kind of ‘algorithm’. The results vary depending on the model.
❸ This is the prompt input area. A prompt is a message that helps someone perform a specific task. This is where you write “Please draw a picture like this” to the generative AI.
❹ This is the negative prompt input area. A negative prompt has the opposite meaning of the prompt. Write down what you don’t want in the image.
❺ Click [Generate] and AI will generate the image.
❻ A random image is created without you entering any prompts?! Images can be viewed in this area.
❼ Sampling steps refer to how many times the AI will perform the drawing. The larger the number, the more elaborate the picture becomes, but it takes longer.
❽ Batch size refers to how many pictures the AI will draw for one image creation request. You can have it draw up to 8 pictures.
❾ CFG Scale is a term that refers to how faithfully the AI will follow the prompt description. Usually the default value (7) is used.
6. Let’s draw a cloud character together!
Now that you have learned the basics, shall we try using it? What do you want to draw? I will draw a cloud character. The image I will draw is a cloud character with arms, hands, and eyes. We will draw it in a cartoon style. Place the following in the prompt:
Cloud Character, ultra high res, best quality, masterpiece, cute, game, icon, Digital Painting, artstationFinally, enter 8 as the Batch size so that the AI will draw 8 pictures to select one of several pictures. Now, shall we press the [Generate] button?
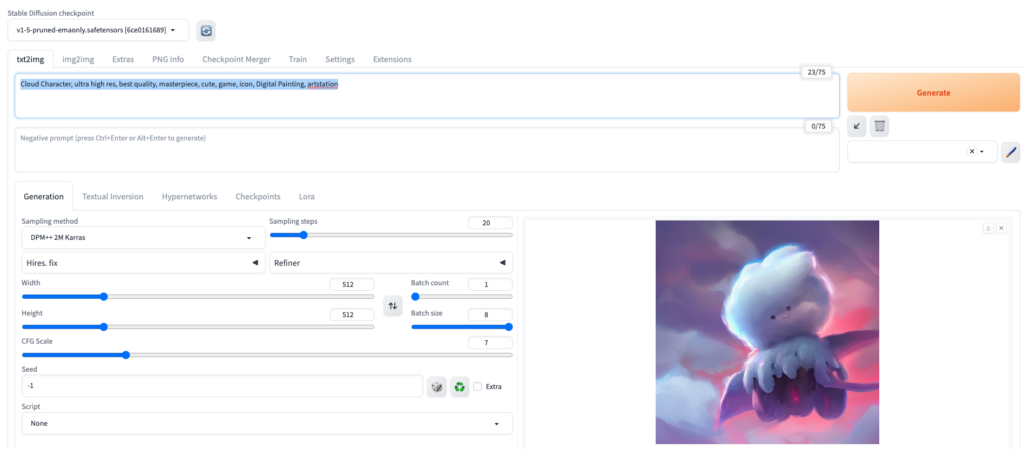
What kind of picture was drawn? Is this the picture you were expecting? Were you disappointed by the strange results?
The style and quality of the generated image will vary depending on the model, prompt, and various options. This is why the term ‘prompt engineering’ appeared. Creating the image you want requires finding a model that draws in a similar style, tweaking the prompts and options, and experimenting.
Now that we have explained all the basics, try drawing more images with goormIDE and Stable Diffusion WebUI. What picture was drawn? ☁️


| 💬 Wait! More people can experience goormIDE’s GPU container service beta There is a limit to the usage time. Currently, only 12 hours per week are available, and usage hours are reset every Monday. Therefore, you must ‘stop’ the container when not in use. If you press the [Stop] button under the GPU container on the goormIDE dashboard, the container will be stopped. To use stable diffusion again, go to [Configure GPU environment] and then click [Run] to run the container. You must relaunch the Stable Diffusion WebUI by entering the following commands in the terminal: cd stable-diffusion-webuibash webui.sh -f |